🎶 Live Music Streaming Setup Series
Whether you’re jamming from home or collaborating with musicians remotely, this series covers everything you need to stream live music like a pro:
- 🎛️ How to Stream a Live Band Performance from Home
- 🌍 Virtual Jam Session Tools for Remote Musicians
- 📱 How to Stream Live Music on Twitch, YouTube & Instagram
Explore each guide to build a powerful and flexible music streaming setup—whether you’re solo or performing with a group.
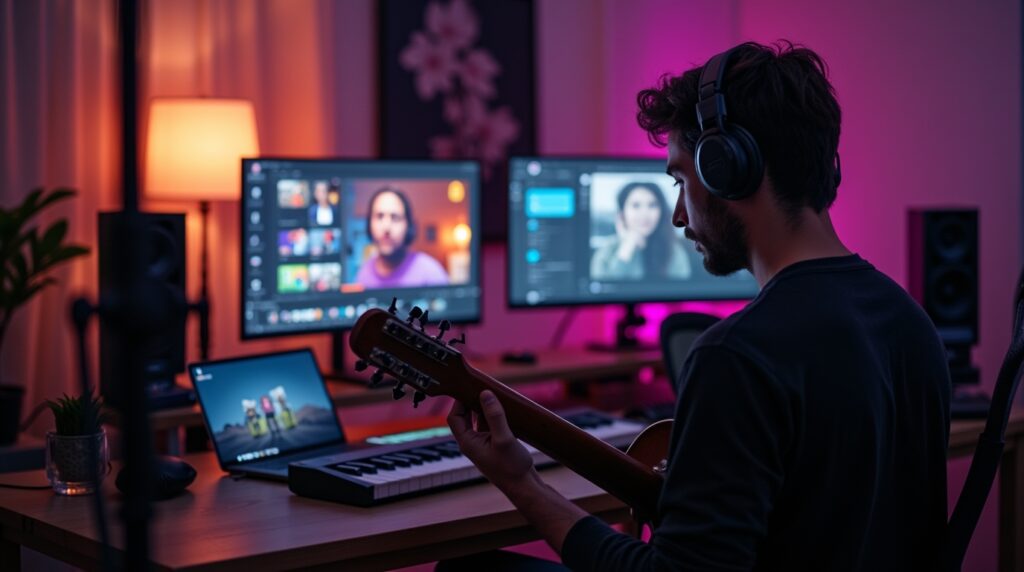
If you want to play live with bandmates or collaborators who are miles away, learning how to stream a virtual jam session with remote musicians can keep your creativity alive. In this guide, we’ll break down everything you need to get started—from low-latency audio tools to video sync and streaming tips.
🎼 What Is a Virtual Jam Session?
A virtual jam session allows musicians in different locations to play together in real-time using audio and video tools over the internet. While latency (delay) is a challenge, the right software and setup can get you surprisingly close to a real live session—great for rehearsals, remote collaborations, and even live streams.
🎯 Why Host a Virtual Jam Session?
- 🧑🤝🧑 Stay connected with bandmates
- 🌎 Collaborate with musicians globally
- 🎙️ Record remote sessions for future content
- 🎥 Stream unique multi-location performances live
- 🎶 Practice or rehearse without physical meetups
🛠️ Tools You’ll Need for Remote Jamming
| Tool Type | Recommendation | Notes |
|---|---|---|
| Low-latency audio | Jamulus, Soundjack, Audiomovers | Specialized apps designed for real-time audio |
| Audio Interface | Focusrite Scarlett, PreSonus, etc. | Required for clean, real-time audio input/output |
| Headphones | Closed-back studio headphones | Prevent echo/feedback |
| Ethernet Cable | Direct connection to router | Wi-Fi is too unstable for real-time jamming |
| OBS or Streamlabs | For streaming sessions live | Combine audio + video from multiple sources |
| Zoom/NDI/OBS Ninja | For video sync and visual connection | Not ideal for audio, but good for visuals |
🏠 Prefer in-person setups? See how to set up a home-based live band stream.
🌐 Want more reach? Check out our multi-platform live music streaming tips.
🔧 How to Stream a Virtual Jam Session (Step-by-Step)
Step 1: Set Up Low-Latency Audio Software
- Download Jamulus or your preferred real-time audio app
- Set your buffer size low (64 samples or lower if possible)
- All musicians should use Ethernet, not Wi-Fi
- Everyone must use an audio interface with ASIO (Windows) or CoreAudio (Mac)
Step 2: Connect Remotely
- Either join a public Jamulus server or create a private one
- Use a common key or password if private
- Test levels, latency, and sync with each musician before playing
Step 3: Add Video via Zoom, NDI, or OBS Ninja
- Use OBS Ninja (or VDO.Ninja) to bring each musician’s video feed into OBS
- Alternatively, set up a Zoom call, crop video windows, and capture screen into OBS
Step 4: Mix Audio + Video in OBS
- In OBS, add:
- Audio input from Jamulus or routing app
- Video sources from each player
- Visual overlays, backgrounds, or scenes
- Optional: Use VoiceMeeter, Loopback, or BlackHole to route clean audio into OBS
Step 5: Go Live or Record the Session
- Choose your platform: YouTube, Facebook, Twitch, or just record locally
- Run a test stream or recording
- Hit “Start Streaming” or “Start Recording” and enjoy the jam!
🎛️ Best Practices for a Smooth Session
- 📶 Everyone must use wired internet
- 🕒 Schedule a tech check 15–30 mins before playing
- 🎚️ Use individual gain staging for clean mix
- 🎵 Start with slower songs—less noticeable latency
- 📡 Consider syncing via a central metronome track or click
📦 Optional Gear to Enhance the Experience
| Gear | Why It Helps |
|---|---|
| External webcam | Sharper video quality for each player |
| Green screen | Isolate players visually in OBS |
| Ring light or softbox | Better lighting for nighttime sessions |
| MIDI sync tools | Sync tempo or loops remotely (advanced) |
| Cloud DAW (Soundtrap, Endlesss) | For collaborative recording |
🔗To reach more fans, discover platform-specific advice in 📱 How to Stream Live Music on Twitch, YouTube & Instagram.
❓ FAQ
Not perfectly, but tools like Jamulus offer low-latency audio that works for many styles—especially ambient, blues, or slow rock.
Yes! Use OBS or Streamlabs to mix all the sources and push to your chosen platform.
Jamulus is free and has a large support community. OBS Ninja is great for video.
💡Boost your collaboration workflow with helpful apps and tools featured in our ⚡ Creator Wellness & Productivity posts.
🔚 Final Thoughts
If you’ve been missing your bandmates or want to collaborate with musicians around the world, learning how to stream a virtual jam session with remote musicians is a game-changer. With the right tools and preparation, you can rehearse, create, and share music together—no matter the distance.
📚 Want the full picture? This article is part of our Live Music Streaming Setup Series, covering everything from home band performance to remote jam sessions and streaming across platforms.